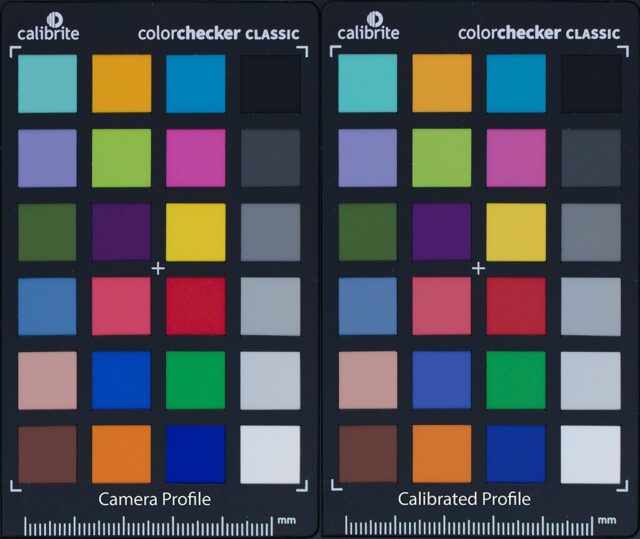
This post is a tutorial for digital camera calibration on macOS Sonoma 14 with open source tools. I followed this article on RawTherapee website, but made some modification based on changes in new operating system.
Why not just using the software from the vendor to do this? So far some of the software like the ColorChecker Camera Calibration only generate a 173B *.dcp file from the DNG raw file, which looks very fishy.
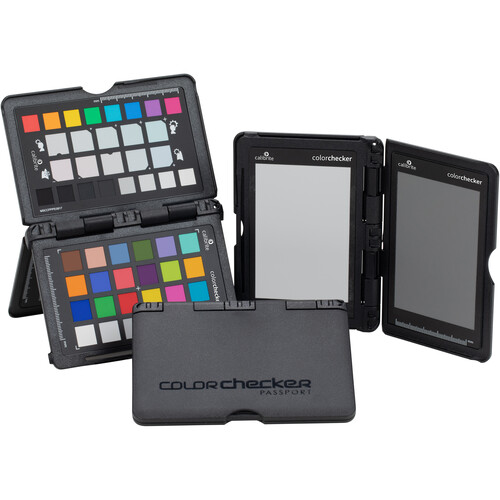
- Purchase calibration target: many types of calibration targets are supported, like SpyderCHECKER24, ColorCheckerPassport, etc.
- Shoot the calibration target: follow “Shooting the Color Target” in this document.
- Building dcamprof from source:
- Download the source code from https://github.com/Beep6581/dcamprof
- Install homebrew on macOS Sonoma 13.4: follow https://brew.sh, run the following command in terminal:
/bin/bash -c "$(curl -fsSL https://raw.githubusercontent.com/Homebrew/install/HEAD/install.sh)" - Install gcc and other dependencies with homebrew: dcamprof requires GCC to compile but modern macOS only uses llvm, so we have to install our own copy of GCC.
brew install gcc little-cms2 libtiff - Modifying the Makefile. First run brew list gcc to find the path to GCC, looking like /opt/homebrew/Cellar/gcc/13.2.0/bin/gcc-13. Modify the “CC” variable of Makefile to CC = gcc-13. And also add two lines to specify the path of library and header directory installed by homebrew: LDFLAGS += -L/opt/homebrew/lib and INCLUDE += -I/opt/homebrew/include.
- Compile dcamprof by run make. Then install by run make install.
- Convert the calibration target photo to TIFF:
- Though you can do it manually in RawTherapee, but personally I prefer to do the conversion with dcraw (an amazing single file decoder written in C, developed and maintain by Dave Coffin since this day 26 years ago, and supports hundreds of digital camera’s raw format) in a simpler way. Install the dcraw with homebrew by run brew install dcraw, and convert the *.nef to *.tiff by run dcraw -v -r 1 1 1 1 -o 0 -H 0 -T -6 -W -g 1 1 Ref.nef. The output image will look dark and green, because A. it uses linear gamma, and B. the camera sensor is more sensitive to green light.
- Generate *.dcp profile with Argyll CMS and DCamProf:
- Argyll CMS can be installed with homebrew by run brew install argyll-cms
- Go into the directory with the calibration target photo and run scanin -v -dipn Ref.tiff /opt/homebrew/Cellar/argyll-cms/3.1.0/ref/ColorCheckerHalfPassport.cht /opt/homebrew/Cellar/argyll-cms/3.1.0/ref/ColorCheckerHalfPassport.cie Ref-diag.tif
A target information file “Ref.ti3” will be generated. - Generate the profile data by run dcamprof make-profile -I 5300K -C Ref.ti3 Ref.json Adjust the color temperature according to your lighting condition.
- Generate the *.dcp profile by run dcamprof make-dcp -n "Nikon D5300" -d "Nikon D5300" -t acr Ref.json "Nikon D5300.dcp"
- For Adobe Camera Raw (used by Lightroom and Photoshop), copy the generated *.dcp file to /Users/yiming.chen/Library/Application Support/Adobe/CameraRaw/CameraProfiles. For automatic camera matching in RawTherapee, copy it to /Applications/RawTherapee.app/Contents/Resources/share/dcpprofiles, or apply the profile in Color Management manually when you process the raw photo.